If you love your garden but hate wasting time and water, a drip irrigation system might be the best upgrade you can give it. In plain language, drip irrigation delivers water slowly and directly to plant roots where it’s needed most. That means healthier plants, fewer weeds, and dramatic water savings. Best of all, you don’t need to spend a fortune or hire a professional to get started — with a little planning and some inexpensive supplies, you can install an economical drip system that fits your yard, your plants, and your budget.
This guide walks you through everything from planning to installation to maintenance, written in a friendly, conversational tone. I’ll break down the technical bits into simple steps, offer practical cost-saving tips, and highlight common mistakes to avoid. Whether you have a patch of vegetables, a row of shrubs, container plants on a balcony, or a small fruit orchard, you’ll find clear instructions and real-life examples that make this project approachable and useful.
Why Choose Drip Irrigation?

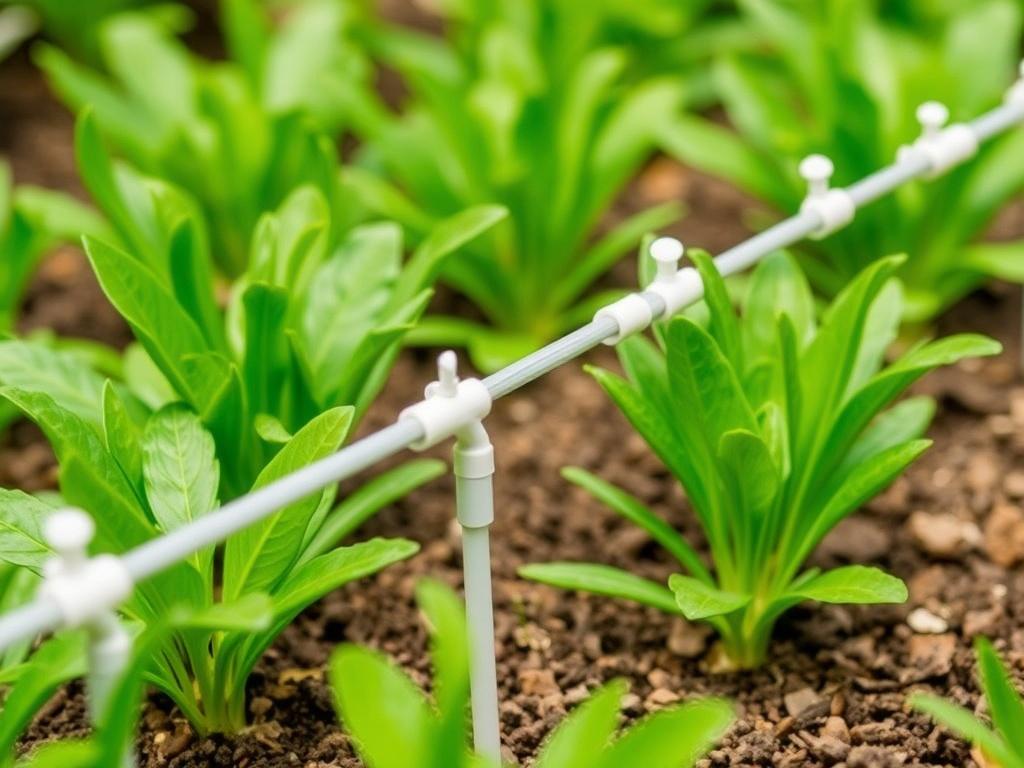
Drip irrigation is one of those garden upgrades that pays back quickly. Unlike overhead sprinklers, drip systems put water where plants actually use it: at the root zone. That keeps foliage dry (reducing disease), reduces evaporation, and eliminates much of the runoff that wastes water and soil. For gardeners on limited budgets, that efficiency translates to lower water bills and healthier plants for less effort.
Beyond savings, the drip method is flexible. You can water small raised beds, long rows, container groups, or isolated trees with different emitter types and layouts. A simple DIY setup can be expanded later as your garden grows. Because it operates at low pressure and slow flow, a drip system can often run on a gravity-fed rain barrel or a low-pressure city tap if you design it right — making it genuinely economical to install and run.
Planning Your System: Start Smart
Good planning saves money and headaches. Before you buy anything, take a few minutes to assess your site and make a simple plan.
Survey your garden
Walk your garden and note the areas you want to water. Sketch a quick map — it doesn’t need to be pretty. Mark beds, rows, containers, trees, hose bibs (outdoor taps), and any slope or shade differences. Think about where the water source will be and how a mainline could run to all zones.
Know your water source and pressure
Two key measurements determine what equipment you need: flow (how many liters or gallons per minute or hour your tap provides) and pressure (measured in psi or bars). You can estimate flow by timing how long it takes to fill a 10-liter bucket from your tap. That tells you how many liters per minute you have available. For most home drip systems, low pressure is fine, but you may need a pressure regulator if your tap pressure is high (>40 psi / ~2.8 bar).
Group plants by water needs (hydrozoning)
Group plants that need similar moisture together: vegetables vs. succulents, lawn vs. shrubs. That way one watering schedule can serve each zone efficiently and you won’t waste water on plants that prefer dry feet.
Plan your zones
Drip systems work in zones. Each zone runs separately because the total flow of emitters in a single zone must not exceed your water source capacity. Typical zones for a small garden are 4–6 beds, or 6–12 containers. Plan zones so that emitters’ combined flow stays below what your tap can supply.
Tools and Materials You’ll Need
You don’t need fancy tools—most of what you need is inexpensive and available at garden centers or online.
- Mainline tubing (usually 1/2″ or 5/8″ polyethylene)
- Microtubing (1/4″) for individual branches
- Drip emitters (0.5, 1, 2 GPH common) or dripline (integrated emitters)
- Backflow preventer (if required by local code)
- Filter (mesh or disc) — important if your water has particles
- Pressure regulator (if pressure is above recommended limits)
- Connectors, tees, elbows, barbed fittings
- End caps and flush valves
- Hole punch for tubing
- Stakes or clamps to secure tubing
- Timer (mechanical or battery/solar) – optional but very useful
- Scissors or tubing cutter
- Mulch to reduce evaporation and suppress weeds
Budget-friendly shopping tips
Buy common items like tubing and emitters in bulk. Reuse old hoses as supply lines, or retrofit soaker hoses where appropriate. Local co-ops or community gardens sometimes have spare fittings. If you’re unsure, start small with one zone and expand.
Understanding Emitters and Flow Rates
The emitters you choose control how much water each plant gets and determine how long you must run the system.
Emitter flow ratings
Emitters are commonly rated in GPH (gallons per hour) or LPH (liters per hour). Common values:
- 0.5 GPH ≈ 1.9 LPH — very slow, good for seedlings or succulents
- 1.0 GPH ≈ 3.8 LPH — general-purpose for many plants
- 2.0 GPH ≈ 7.6 LPH — good for thirsty vegetables or long runs
Use pressure-compensating emitters in long runs or on sloped sites where pressure varies. Pressure-compensating emitters deliver a consistent flow over a range of pressures.
How to calculate run time
Simple math saves water. If you have ten 1.0 GPH emitters on a zone, that zone uses 10 GPH. If your plants need 1 inch of water per week (about 0.623 gallons per sq ft per week) and your bed is 20 sq ft, calculate total gallons needed and divide by system flow to find how long to run each session. Another approach: water until soil is moist to the root depth and time that run; repeat less frequently rather than long, wasteful sessions.
Component Choices: What to Buy and Why
Choosing the right components influences how economical and reliable your system will be. Below is a practical comparison.
| Component | Why it matters | Budget option | Recommended for reliability |
|---|---|---|---|
| Filter | Prevents emitter clogs from sand and debris | Simple mesh screen | 0.01–0.02″ disc filter for particulate water |
| Pressure regulator | Protects emitters and ensures even flow | No regulator if city pressure is low | Adjustable 25–30 psi (1.7–2.0 bar) |
| Emitters | Control flow to each plant | Non-pressure-compensating micro-emitter | Pressure-compensating drippers or inline dripline |
| Mainline tubing | Main water channel for zones | Low-cost polyethylene | UV-resistant polyethylene or dripline with integrated emitters |
| Timer | Automates watering, saves time | Simple mechanical timer | Battery or solar digital timer with multiple programs |
Step-by-Step Installation

Now for the enjoyable part: installing your system. I’ll walk you through one straightforward example: a small vegetable bed with a nearby hose bib. The same principles apply if you’re working with containers or shrubs.
Step 1 — Layout and measure
On your sketch, draw the path from the water source to the furthest point of the zone. Measure approximate lengths to estimate how much mainline tubing and microtubing you need. Add a little extra to allow for curves.
Step 2 — Install the backflow preventer, filter, and pressure regulator
If required by code, attach a backflow preventer to the faucet first. Next install a filter and a pressure regulator. These usually screw together in the faucet thread and then connect to the mainline with a threaded adapter. Keeping debris out and the pressure steady prevents headaches later.
Step 3 — Lay out mainline tubing
Unroll the mainline tubing along the planned route and secure it with stakes. If you’re running tubing across a lawn or exposed soil, burying it a couple of inches deep keeps it out of the way and reduces UV exposure. Punch holes where you’ll branch off to microtubing or where dripline will start.
Step 4 — Add emitters or dripline
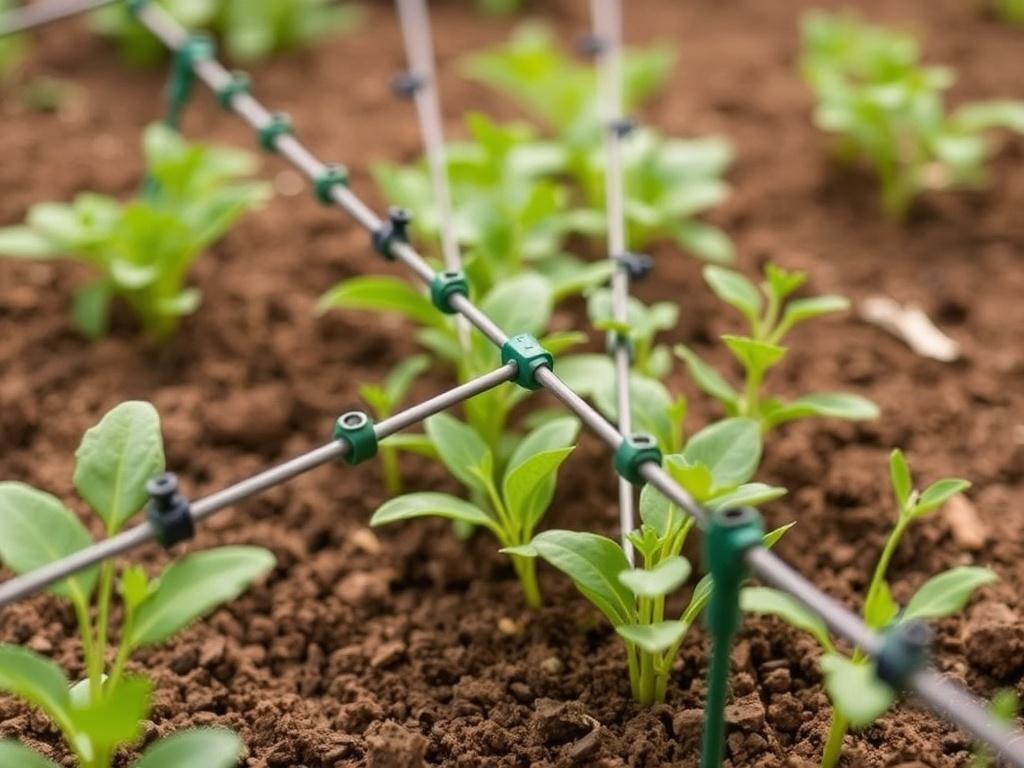
For plants spaced irregularly, use microtubing and individual emitters. For rows or uniform plantings, lay dripline (tube with integrated emitters every 12–18 inches). Insert emitters into punched holes and place the end of microtubing near the root ball, securing it with a stake.
Step 5 — Cap the ends and add flush valves
Cap the ends of mainline and dripline to create pressure in the system. Include a flushable end or a manual valve at the lowest point so you can clear sediments out periodically.
Step 6 — Test for leaks and coverage
Turn on the water and watch each emitter. Look for leaks, poor emitter function, or overspray (if using micro-sprays). Adjust emitter positions and add or remove emitters to ensure water wets the root zone evenly.
Step 7 — Automate with a timer
A timer makes consistent watering effortless. Set it for short cycles early in the morning and, if needed, repeat every few days rather than daily watering that can encourage shallow roots.
Example Layouts and How to Adapt Them
Different garden types need slightly different approaches. Here are three common examples.
Vegetable bed (rectangular raised bed)
– Use dripline with emitters every 6–12 inches for densely planted beds, or place two main lines 8–12 inches apart for wider beds.
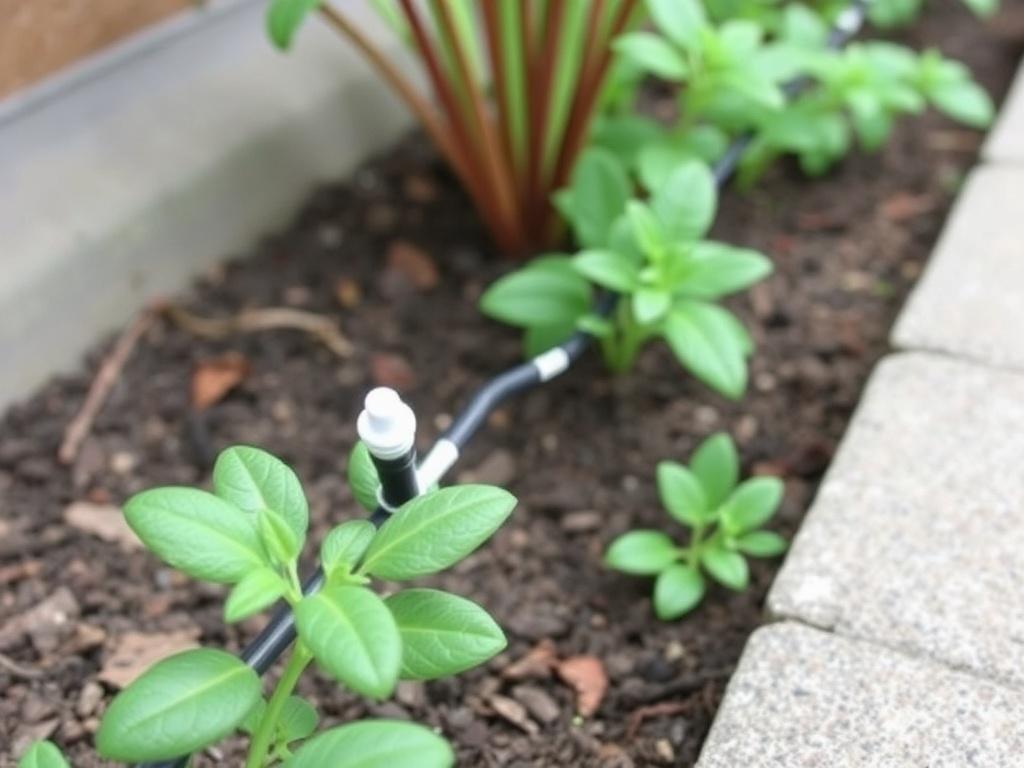
– Run the mainline along the bed edge and use short microtubes to reach individual plants if needed.
Container garden (balcony or patio)
– Run a small mainline along your railing and use microtubing to reach each pot.
– Use 1.0 GPH emitters for medium pots, 0.5 GPH for small pots. Group similar-sized pots on the same zone.
Shrubs and trees
– Use drip emitters at the root zone, placing two to three emitters around the perimeter of the canopy. For trees, emitters spaced 12–18 inches from the trunk along the drip line are ideal.
Maintenance: Keep It Running Smoothly
A little maintenance keeps your system efficient and long-lasting.
- Flush lines seasonally or after long idle periods to clear sediment.
- Clean or replace filters regularly; frequency depends on water quality.
- Check emitters for algae or mineral buildup and soak clogged parts in vinegar if needed.
- Inspect for leaks, pinholes, or wildlife damage and repair promptly.
- Winterize by draining lines if you live in a freezing climate to avoid split tubing.
- Adjust schedules seasonally; reduce watering in cool or rainy periods and increase in hot, dry spells.
Troubleshooting Common Issues
A few problems crop up often, and most are easy to fix.
Low pressure or poor emitter output
Check for blocked filters, kinks in tubing, or closed valves. Measure pressure — you might need a pressure regulator or to reduce the number of emitters per zone.
Clogged emitters
Disassemble and soak in vinegar, or replace the emitter if it’s cheap. Filters are your first line of defense; if clogs are frequent, upgrade filter size.
Uneven wetting
Use pressure-compensating emitters or shorten runs. On slopes, place emitters more closely at the top of a line.
Leaks and rodents
Repair tubing with a short replacement segment and barbed coupler. Use thicker tubing in areas with frequent disturbance.
How to Make Your System Even More Economical
If you’re building on a tight budget, clever choices make a big difference.
Reuse and repurpose
Old garden hoses can be used as supply lines. Reclaimed barrels and cisterns can store rainwater to run a gravity-fed system. Use inexpensive soaker hoses in rows where precision isn’t necessary.
Buy in bulk and local
Emitters and tubing are cheaper per unit in larger rolls or packs. Compare prices between big-box stores, specialty irrigation shops, and online suppliers. Local cooperative extensions or gardening clubs sometimes offer discounts or group buys.
Use passive water sources
Where permitted and feasible, gravity-fed systems from rain barrels can operate at low pressure using compatible emitters. Pair them with gravity-friendly dripline and wide emitter spacing.
Solar or battery timers
A small battery or solar-powered timer automates watering without needing a wired outlet, saving installation costs. Basic timers are inexpensive and eliminate wasted runs.
Mulch and soil health
Mulch reduces evaporation so you can run the system less often. Improving soil organic matter increases water retention and cuts irrigation needs over time.
Cost Estimates and How to Budget
Here’s a simple cost breakdown to help you budget your project. Prices vary widely by region and brand, but these ranges should give you a ballpark.
| System size | Typical components | Estimated cost (USD) |
|---|---|---|
| Small (1–2 beds, ~50 ft tubing) | Basic timer, filter, mainline, emitters | $50–$150 |
| Medium (3–6 beds, ~150 ft tubing) | Digital timer, pressure regulator, dripline sections | $150–$350 |
| Large (yard or multiple zones) | Multiple valves, larger filter, zone controllers | $350–$1,000+ |
Remember: a simple DIY system can be started for under $100 if you shop smart and reuse materials. The biggest cost saver is designing for efficiency and not over-watering.
Emitter Types Compared
Not all emitters are the same. Knowing differences helps you pick the right one.
| Emitter type | How it works | Best uses | Pros | Cons |
|---|---|---|---|---|
| Point emitter (1/4″ barb) | Single outlet connected by microtube | Individual plants, containers | Flexible, cheap, replaceable | Can clog, not pressure balanced |
| Inline dripline | Emitters molded inside a tube | Vegetable rows, long lines | Uniform spacing, quick to install | Less flexible for irregular spacing |
| Pressure-compensating dripper | Built-in mechanism to maintain flow | Slopes and long runs | Even output despite pressure changes | More expensive |
| Soaker hose | Permeable hose that seeps water along its length | Dense rows or bedding plants | Simple, low cost | Less precise and can be shallow watering |
Common Mistakes and How to Avoid Them
A few errors keep popping up with DIY systems. Avoiding them will save time and water.
- Overloading zones — don’t attach too many emitters to one faucet. Calculate flow and limit the number of emitters per zone.
- Skipping the filter — this causes clogs and extra maintenance.
- Placing emitters incorrectly — put them where roots are or will be, not on the soil surface out of reach of roots.
- Not winterizing — freezing water in lines can split tubing, costing more later.
- Running too long — shorter, deeper watering encourages strong roots; avoid very long shallow runs.
Seasonal Adjustments and Watering Schedules
Your schedule should reflect weather, plant growth stage, and soil type. Here are general tips:
- Spring: water less frequently as temperatures rise slowly; seedlings need shorter, more frequent cycles.
- Summer: increase frequency; run early morning to reduce evaporation and disease risk.
- Fall: taper off as temperatures cool; deep watering before frost helps resilience.
- Winter (non-freezing areas): reduce frequency significantly; many plants are dormant.
A rule of thumb: check soil moisture 2–4 inches below the surface to decide if watering is needed. Use short test runs when establishing a new bed, then adjust.
Integrating Rainwater and Sustainable Practices

If you’re after both economy and sustainability, link your drip system to harvested rainwater. Rain barrels can supply low-pressure systems if set up near the beds and raised high enough for gravity flow. Use a screen to keep out debris and a first-flush diverter to avoid stale water.
Mulching, composting, and improving soil structure reduce irrigation needs over time. Native and drought-tolerant plants also cut water consumption and often perform well with drip irrigation.
Expanding and Modifying Your System Later
One of the best parts of drip systems is how modular they are. Want to add a new bed or move emitters? It’s easy. Keep extra connectors and tubing on hand. When expanding, check your tap’s flow capacity and add zones if required to avoid overextending a single line.
If you later add a smart controller or rain sensor, you can further optimize watering and save money on water bills. Smart controllers adjust schedules based on weather forecasts or soil moisture sensors.
Quick Reference: Steps at a Glance
| Phase | Key actions |
|---|---|
| Plan | Map garden, measure flow, group plants by needs |
| Buy | Get mainline, emitters, filter, regulator, connectors |
| Install | Attach backflow, lay mainline, add emitters/dripline, cap & flush |
| Test | Run system, fix leaks, check coverage |
| Maintain | Flush, clean filters, seasonally adjust schedule |
Real-Life Example: Small Raised Bed Calculation
Imagine a 4×8 ft raised bed planted with tomatoes spaced 18 inches apart (about 12 plants). If you use two 1.0 GPH emitters per plant, total flow = 12 plants × 2 GPH = 24 GPH. If your tap provides 8 GPM (gallons per minute), that is 480 GPH — more than enough for that zone. To deliver 1 gallon per plant per day, you’d need to run the system for 6 minutes total (12 gallons needed / 2 GPH per plant = 6 hours? Let’s be clear). A simpler approach: 2 GPH emitter per plant delivering 2 gallons per hour means each plant gets 2 gallons after one hour. If you need 1 gallon per plant, run for 30 minutes. The key is to calculate volume needed, divide by emitter output, and set run times accordingly.
Final Tips from Experience
Start small to learn the system. Keep spare emitters and connectors in a labeled box. When testing, watch the system for at least one full cycle and note which spots are dry or flooded. Mulch around emitters to reduce evaporation and make watering more even. And remember: slower, deeper watering is usually better than frequent shallow sprays.
Conclusion
Installing an economical drip irrigation system is one of the smartest moves a gardener can make: it saves water, time, and money while improving plant health. With a bit of planning, inexpensive materials, and a small time investment up front, you can build a flexible system that suits beds, containers, shrubs, and trees. Start with a single zone, use filters and a pressure regulator for reliability, group plants by water needs, and automate with a timer. Maintain it with seasonal flushing and simple checks, and you’ll enjoy the payoff in reduced bills and a thriving garden.


